一款基于WebStackPage的 Hexo 主题。Demo
安装
git clone https://github.com/HCLonely/hexo-theme-webstack themes/webstack
配置
favicon
网站图标
示例:
favicon: /favicon.ico
banner
[可选]分享网站到 twitter 和 facebook 时的图片。
示例:
banner: /images/webstack_banner_cn.png
logo
网站 logo
expanded: 侧边栏展开时左上角的 logo
collapsed: 侧边栏收起时左上角的 logo
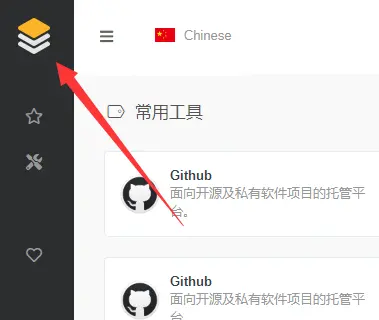
dark: 顶栏为暗色时左上角的 logo, 仅 about 页面生效
示例:
logo: expanded: /images/logo@2x.png collapsed: /images/logo-collapsed@2x.png dark: /images/logo_dark@2x.png
flag
语言标识,多语言请配合子页面使用
- icon: 语言图标,默认仅有
flag-cn和flag-us, 其他图标自行寻找存放于主题目录/source/images/flags/ - name: 语言名称
- default: 该语言是否为默认语言
- index: 页面链接
示例:
flag: - name: Chinese default: true icon: flag-cn index: /index.html

search
是否显示搜索框
示例:
search: true
userDefinedSearchData
自定义搜索引擎
- custom: 是否启用自定义配置
- thisSearch: 当前搜索引擎的搜索链接
- thisSearchIcon: 当前搜索引擎的图标链接,格式为
url(图片链接) - hotStatus: 是否启用搜热词功能
- data: 多搜索引擎配置
- name: 搜索引擎名字
img: 搜索引擎的搜索链接
url: 搜索引擎的图标链接,格式为url(图片链接)
示例:
userDefinedSearchData: custom: true thisSearch: https://www.baidu.com/s?wd= thisSearchIcon: url(https://www.baidu.com/favicon.ico) hotStatus: true data: - name: 百度 img: url(https://www.baidu.com/favicon.ico) url: https://www.baidu.com/s?wd= - name: 谷歌 img: url(https://www.google.com/favicon.ico) url: https://www.google.com/search?q=
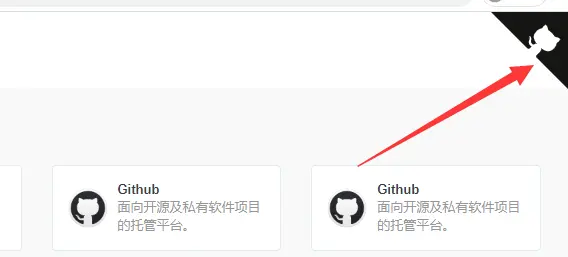
githubCorner
右上角的 github corner
示例:
githubCorner: '<a href="https://github.com/HCLonely/hexo-theme-webstack" class="github-corner" aria-label="View source on GitHub"><svg width="80" height="80" viewBox="0 0 250 250" style="fill:#151513; color:#fff; position: absolute; top: 0; border: 0; right: 0;" aria-hidden="true"><path d="M0,0 L115,115 L130,115 L142,142 L250,250 L250,0 Z"></path><path d="M128.3,109.0 C113.8,99.7 119.0,89.6 119.0,89.6 C122.0,82.7 120.5,78.6 120.5,78.6 C119.2,72.0 123.4,76.3 123.4,76.3 C127.3,80.9 125.5,87.3 125.5,87.3 C122.9,97.6 130.6,101.9 134.4,103.2" fill="currentColor" style="transform-origin: 130px 106px;" class="octo-arm"></path><path d="M115.0,115.0 C114.9,115.1 118.7,116.5 119.8,115.4 L133.7,101.6 C136.9,99.2 139.9,98.4 142.2,98.6 C133.8,88.0 127.5,74.4 143.8,58.0 C148.5,53.4 154.0,51.2 159.7,51.0 C160.3,49.4 163.2,43.6 171.4,40.1 C171.4,40.1 176.1,42.5 178.8,56.2 C183.1,58.6 187.2,61.8 190.9,65.4 C194.5,69.0 197.7,73.2 200.1,77.6 C213.8,80.2 216.3,84.9 216.3,84.9 C212.7,93.1 206.9,96.0 205.4,96.6 C205.1,102.4 203.0,107.8 198.3,112.5 C181.9,128.9 168.3,122.5 157.7,114.1 C157.9,116.9 156.7,120.9 152.7,124.9 L141.0,136.5 C139.8,137.7 141.6,141.9 141.8,141.8 Z" fill="currentColor" class="octo-body"></path></svg></a><style>.github-corner:hover .octo-arm{animation:octocat-wave 560ms ease-in-out}@keyframes octocat-wave{0%,100%{transform:rotate(0)}20%,60%{transform:rotate(-25deg)}40%,80%{transform:rotate(10deg)}}@media (max-width:500px){.github-corner:hover .octo-arm{animation:none}.github-corner .octo-arm{animation:octocat-wave 560ms ease-in-out}}</style>'
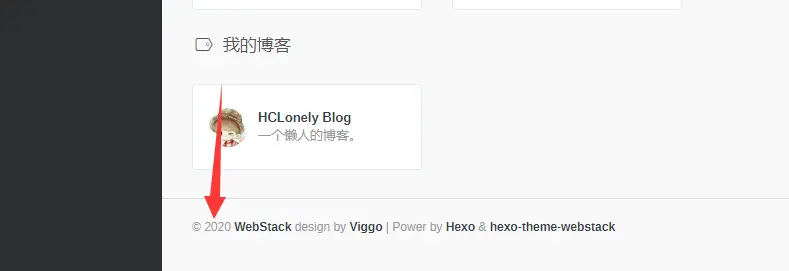
since
建站年份,显示在页面底部
示例:
since: 2020
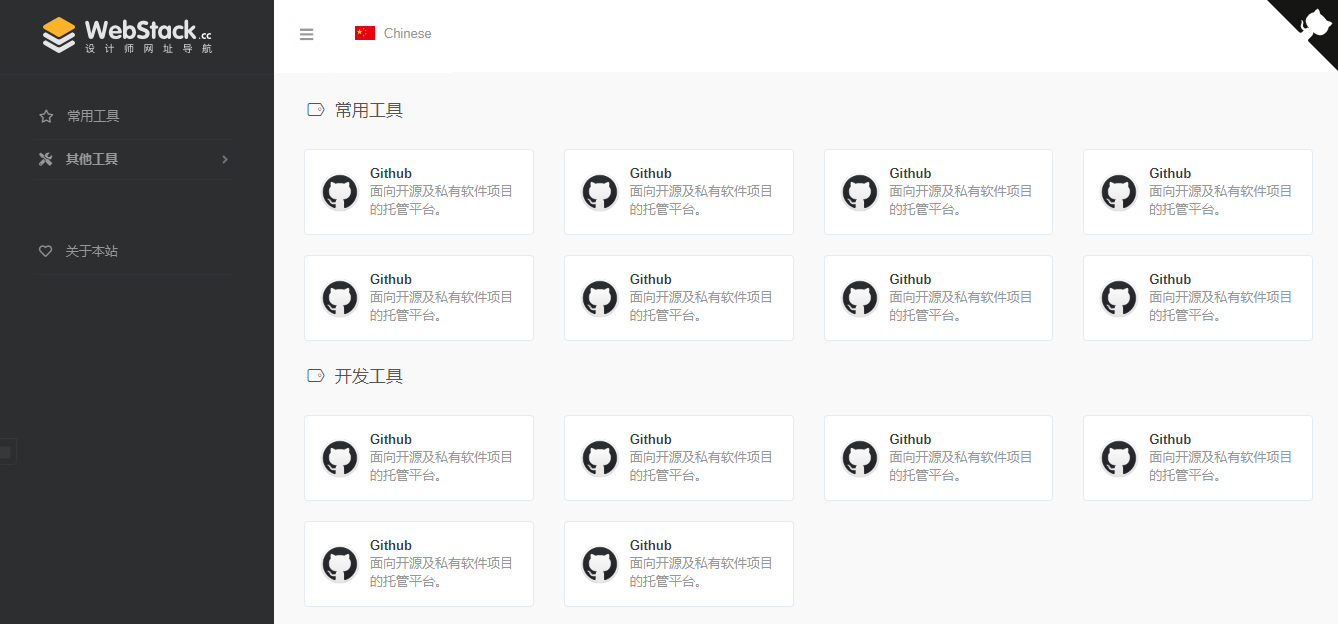
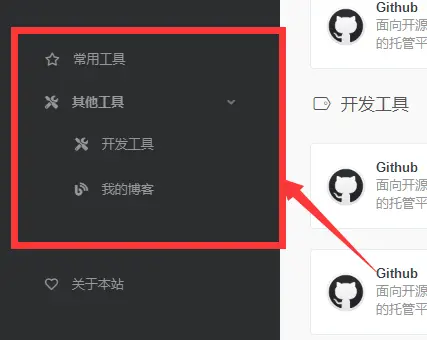
[主要]侧边栏菜单设置
- name: 分组名
- icon: 分组图标
- config: [主要]分组内容(详细设置查看Config),如果有二级菜单则不需要此项!
- submenu: 二级菜单,如果有二级菜单则不需要
config, 此选项内容包含name, icon, config选项
示例:
menu: - name: 常用工具 icon: far fa-star config: hotTools - name: 其他工具 icon: fas fa-tools submenu: - name: 开发工具 icon: fas fa-tools config: devTools - name: 我的博客 icon: fas fa-blog config: myBlog
expandAll
是否将侧边栏全部展开
示例:
expandAll: true
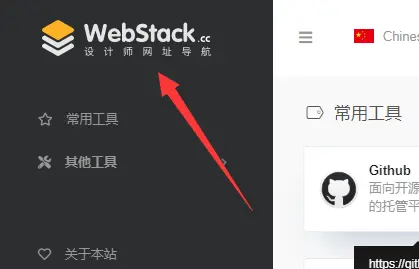
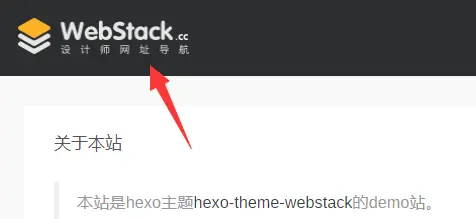
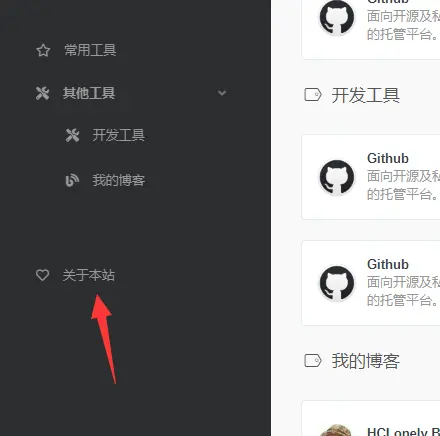
about
侧边栏的关于本站
- url: 关于页面链接
- name: 在侧边栏显示的文字
- icon: 图标
示例:
about: url: /about/ icon: far fa-heart name: 关于本站
aboutPage
关于页面设置
- 生成关于页面
hexo new page about
- 编辑
source/about/index.md, 添加type: 'about'
---title: aboutdate: 2020-06-04 18:11:54type: 'about'---
- 编辑主题配置文件的
aboutPage
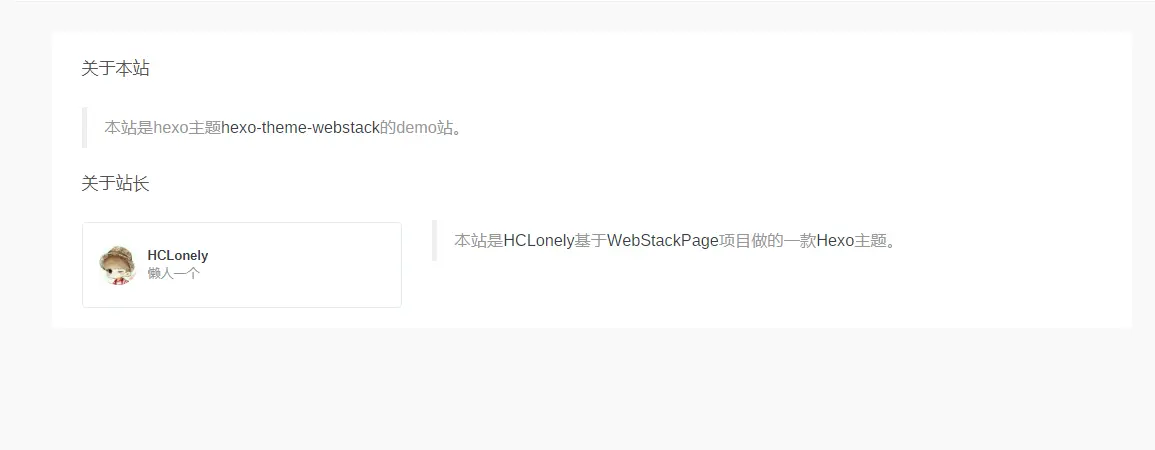
- website: 关于本站内容
- head: 标题
- html: 内容,支持
html语法
- webmaster: 关于站长内容
- head: 标题
- name: 站长名字
- url: 链接
- img: 头像
- description: 描述
- html: 其他内容,支持
html语法
示例:
aboutPage: website: head: 关于本站 html: '<blockquote><p>本站是hexo主题<a href="https://github.com/HCLonely/hexo-theme-webstack">hexo-theme-webstack</a>的demo站。</p></blockquote>' webmaster: head: 关于站长 name: HCLonely url: https://blog.hclonely.com/ img: /images/logos/myblog.png description: 懒人一个 html: '<br /><blockquote><p>本站是<a href="https://github.com/HCLonely">HCLonely</a>基于<a href="https://github.com/WebStackPage/WebStackPage.github.io">WebStackPage</a>项目做的一款<a href="https://hexo.io/">Hexo</a>主题。</p></blockquote>'
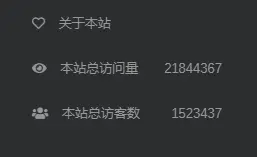
busuanzi
不蒜子统计
- enable: 是否启用不蒜子统计
- position: 访问量显示位置,
footer显示在页脚, sidebar显示在侧边栏 - pv: 访问量显示的内容,
$pv会被替换为访问量 - uv: 访客数显示的内容,
$uv会被替换为访客数
示例:
busuanzi: enable: true position: sidebar pv: 本站总访问量$pv uv: 本站总访客数$uv

custom
自定义html内容
- head: 插入到
<head></head>标签内的内容 - body: 插入到
</body>标签之前的内容
示例:
custom: head: |- <link rel="stylesheet" type="text/css" href="custom.css"> <script src="custom.js"></script> body: |- <div>custom text</div> <script src="custom.js"></script>
config
[主要]网站内容设置
参数
- name: 网站名称
- url: 网站链接
- img: 网站图标
- description: 网站描述
示例:
- name: HCLonely Blog url: https://blog.hclonely.com/ img: /images/logos/myBlog.png description: 一个懒人的博客。
关联设置名称并添加网站
在menu和submenu中设置的config的内容为此选项的名称。
例menu:
menu: - name: 常用工具 icon: far fa-star config: hotTools
则常用工具分组里的网站有以下两种添加方式:
hotTools: - name: HCLonely Blog url: https://blog.hclonely.com/ img: /images/logos/myBlog.png description: 一个懒人的博客。 - name: Github url: https://github.com/ img: /images/logos/github.png description: 面向开源及私有软件项目的托管平台。
- 在
站点根目录/source/_data/(没有自行创建)内新建hotTools.yml文件,文件内容如下:
- name: HCLonely Blog url: https://blog.hclonely.com/ img: /images/logos/myBlog.png description: 一个懒人的博客。- name: Github url: https://github.com/ img: /images/logos/github.png description: 面向开源及私有软件项目的托管平台。
以上两种方式任选一种即可,建议使用第二种。
子页面配置
创建子页面
使用hexo new page xxx创建子页面,这里包括下面的说明都以hexo new page child为例。
修改子页面配置文件
使用上面的命令生成子页面后,打开根目录/source/child/index.md文件(子页面配置文件),在两个---之间添加一行type: 'child'使此配置文件生效,子页面默认使用主页的配置,子页面优先使用子页面配置文件两个---之间的配置,各配置项和主页的配置功能相同。
示例请看https://github.com/HCLonely/hexo-theme-webstack/tree/gh-pages/source/child/index.md
由于子页面在很久之前就基本做完了,后来比较忙就鸽了,可能有些配置或 bug 给忘了,有问题请及时反馈!
]]>